Uploading Custom Landings
Another exciting addition to our dashboard is the ability to upload custom landings. By providing the HTML code of your website, you can seamlessly associate it with any route within the dashboard and gain a view of your website's content and layout.
To utilize this functionality, just follow these steps:
Upload Landing
First, prepare the HTML and CSS code of your webpage and compress it into a ZIP file. After this, navigate to the Landing Management page within the dashboard.
Once you're on the Landing Management page, locate and click the Upload button. In the new page, fill in the required information pertaining to your landing.
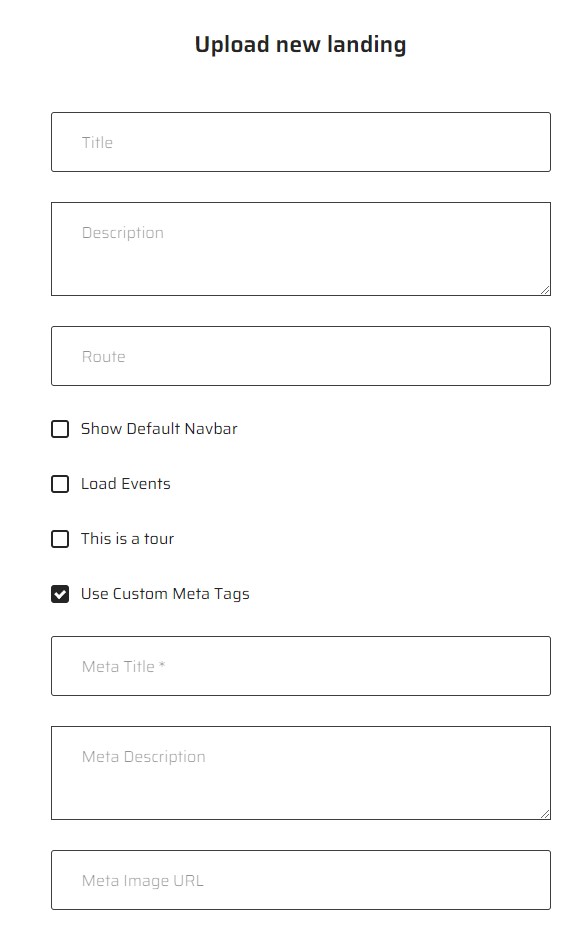
Title: Specify the title of your landing.
Description: Optionally, provide a description of the landing.
Route: Determine the location of the page within the dashboard by specifying the information that will follow this URL: https://dash.onland.io/
Show Default Navbar: Display the default navigation bar of the dashboard.
Load events: If your landing is going to load the events from the dashboard in the landing using the classes specified for events, activate this option.
Use custom meta tags: Changes the SEO information of the landing, you can add a title, description and a image that will appear when you share the landing in social media.
Saving and Previewing
Once all the necessary details are entered, save your changes. You will be redirected to the Landing Management page, where you can preview your landing page within a designated test route.
Take advantage of this preview to assess your webpage's appearance and functionality prior to publishing.
Publication
When you are satisfied with the preview, click the button besides the more menu to publish your landing. Then, simply click the "view" option, and your landing page will be accessible via the chosen route within the dashboard.
Changing Home Page with Custom Landings
You can change the homepage of your dashboard by following the previous steps and simply determining a specific route for your new home page.
Dashboard Root
In this case, you want to place the landing page in the root of your site, so the route will be '/'.
Update the route input to reflect the new route:
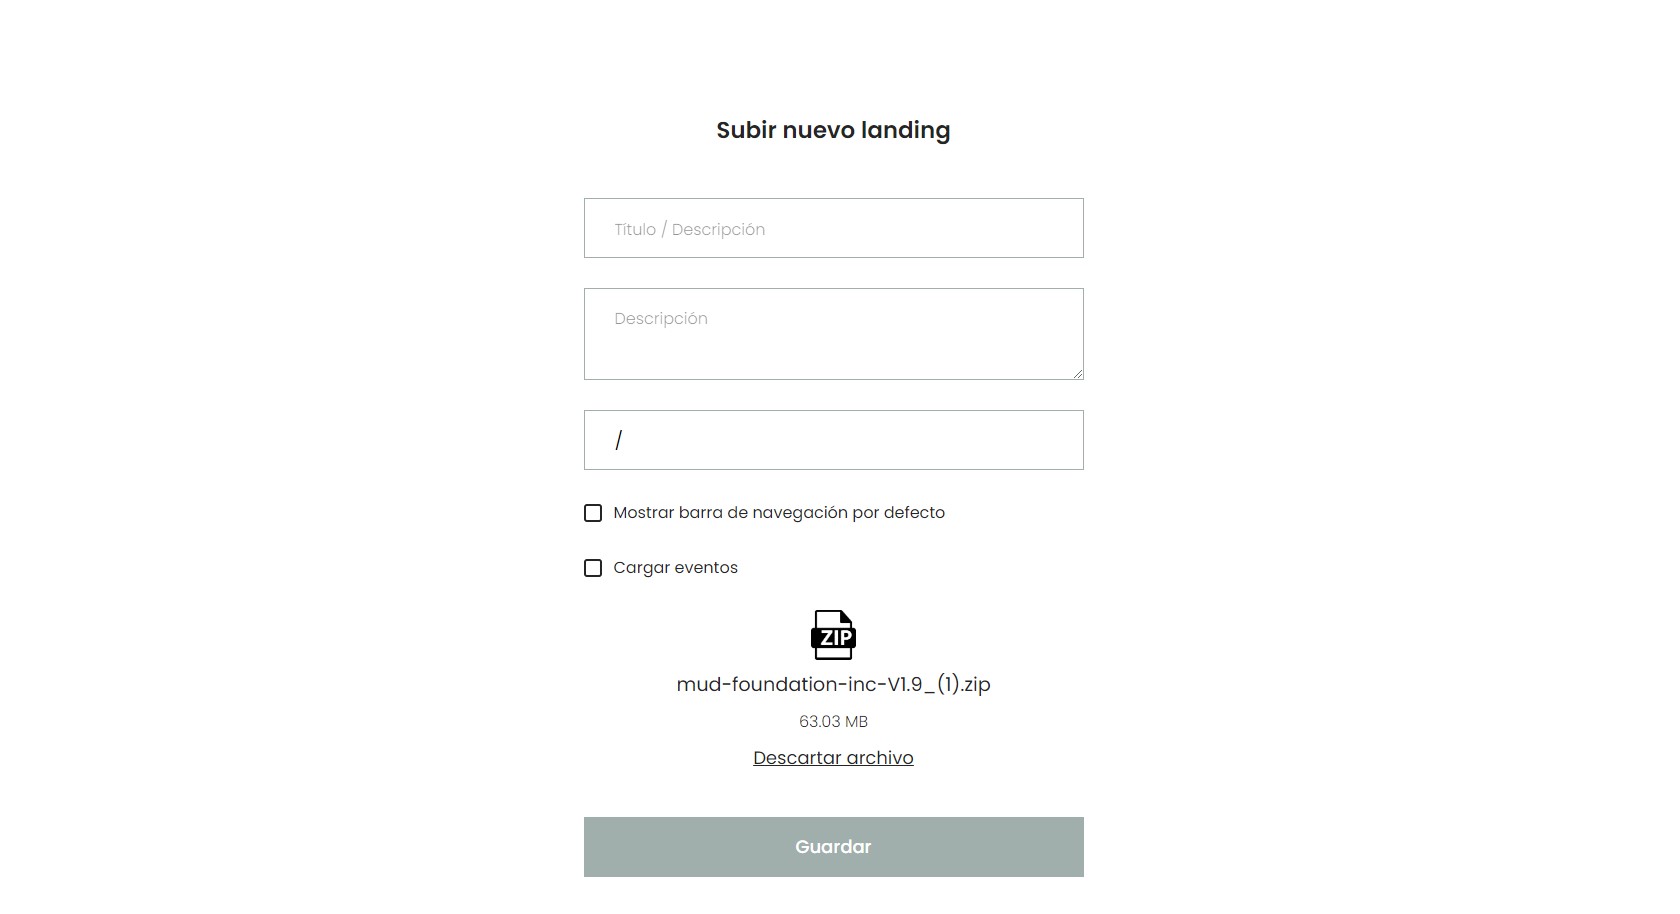
By doing this, after publishing, your new landing page will become the homepage of your dashboard.
Enable Public Event Cards in Custom Landing Pages
If you want to show the current public events from your dashboard in the homepage, you can follow these instructions:
- Create a section where the custom events will appear in your landing.
- Add the required classes to each element in your html in the structure indicated below. These classes will help the system recognize where each text should be placed dynamically.
- Ensure that the classes are added in an orderly manner:
Required Classes:
Event Card:
.event-cardEvent Card Time:
.event-card-timeEvent Card Name:
.event-card-nameEvent Card Description:
.event-card-descriptionEvent Card Image:
.event-card-imageEvent Card Recurrence:
.event-card-recurrenceEvent Card Button (if you need a custom button on the cards, use this class):
.event-card-button
- Class structure:

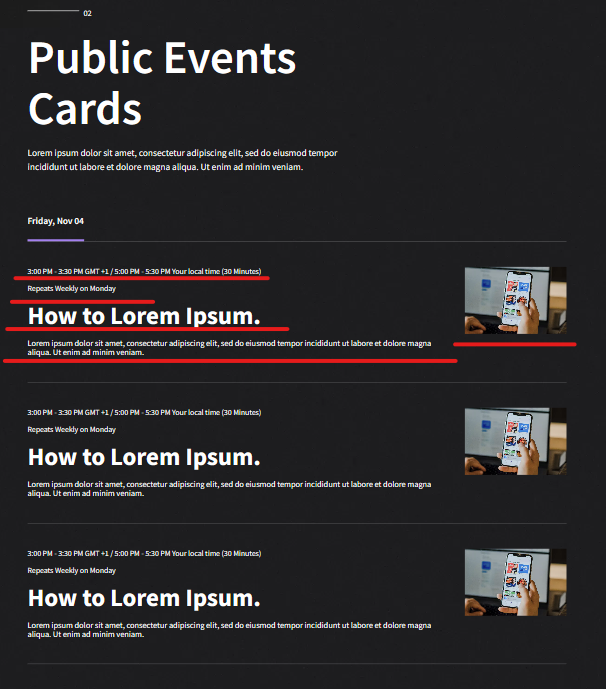
- How cards elements should appear:
This is the structure the section should have before publishing, you can use placeholder texts for where the dynamic text will appear (
.event-card-time,.event-card-recurrence,.event-card-name,.event-card-description,.event-card-image)
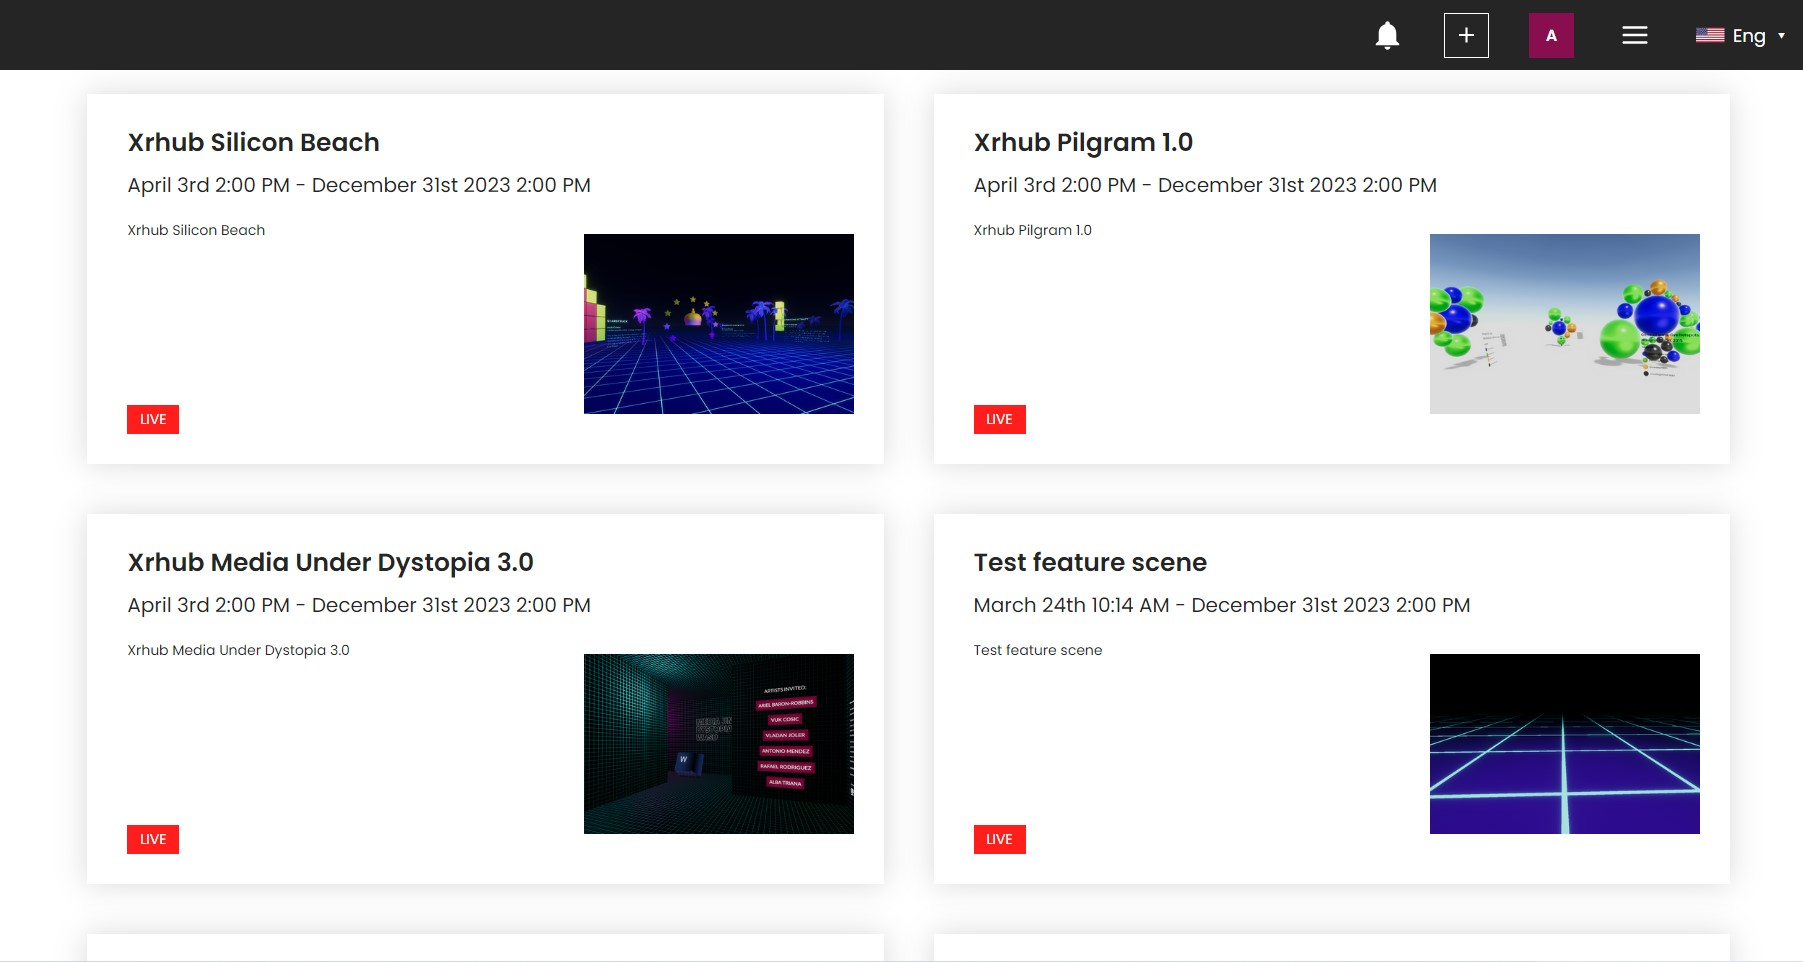
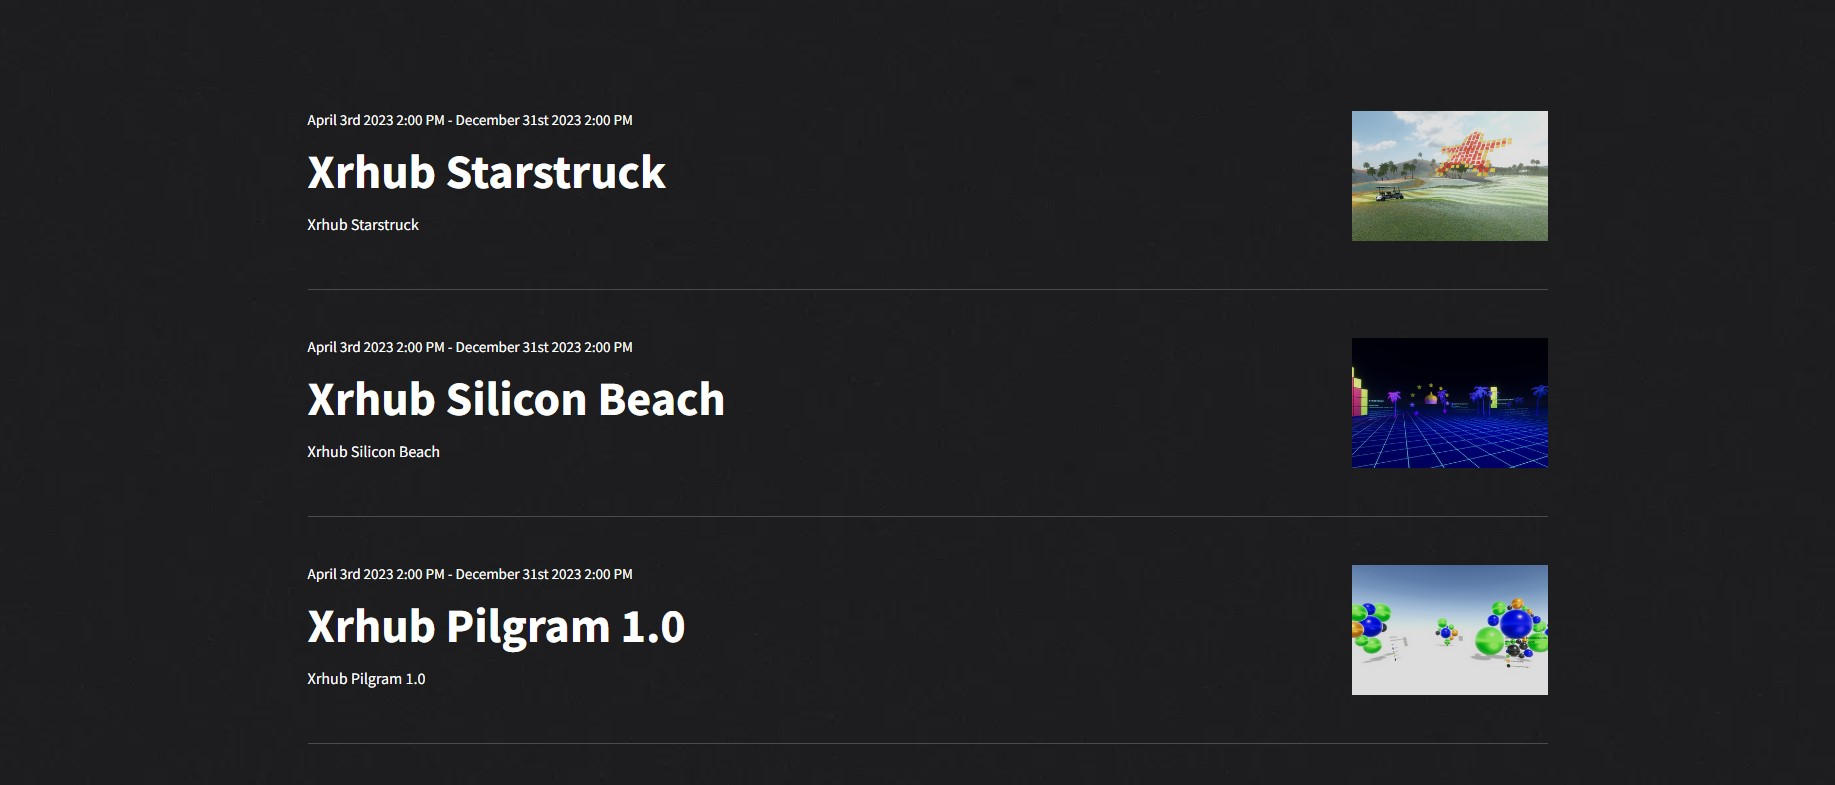
Done! Now your the events in the dashboard will appear in your custom landing:
Adding Custom Landings for Events
By providing the HTML code of your website, you can associate it with any route of an event within the dashboard and gain a view of your website's content and layout.
Event Creation and Custom Landing Upload
- Create an Event:
- Follow the standard procedure to create an event.
- Prepare HTML for Custom Site:
Develop the HTML code for your webpage.
If you want to add an RSVP button, apply the .rsvp-button class to the button.
Compress the HTML files into a ZIP file.
- Upload Custom Landing:
- Navigate to the Landing Management page within the dashboard.
Click the Upload button and fill in the required information:
Title: Specify the title of your landing.
Description: Optionally, provide a description.
Route: Determine the URL of the event you already created, only the information after the root of the URL that mentions the event. For example, if the URL is ‘https://onland.io/events/xr-art-tech-makers-camp’, focus on ‘/events/xr-art-tech-makers-camp’.”
- Save and Preview:
Save your changes.
You will be redirected to the Landing Management page to preview your landing page on a test route.
Use the preview to assess the appearance and functionality before publishing.
- Publish:
Once satisfied with the preview, publish your landing.
Click the "view" option to make your landing page accessible via the chosen route within the dashboard.
These steps enable you to integrate your custom website within the dashboard, allowing easy access and control over its content and presentation. The event will be accessible from the dashboard’s events tab.
Integration of Custom Landings with Typeform and Stripe for Paid Events and Workshops
Create Typeform Survey:
Develop a Typeform flow and add a button at the end for redirection (to be used later for adding the payment link).
Publish the form.
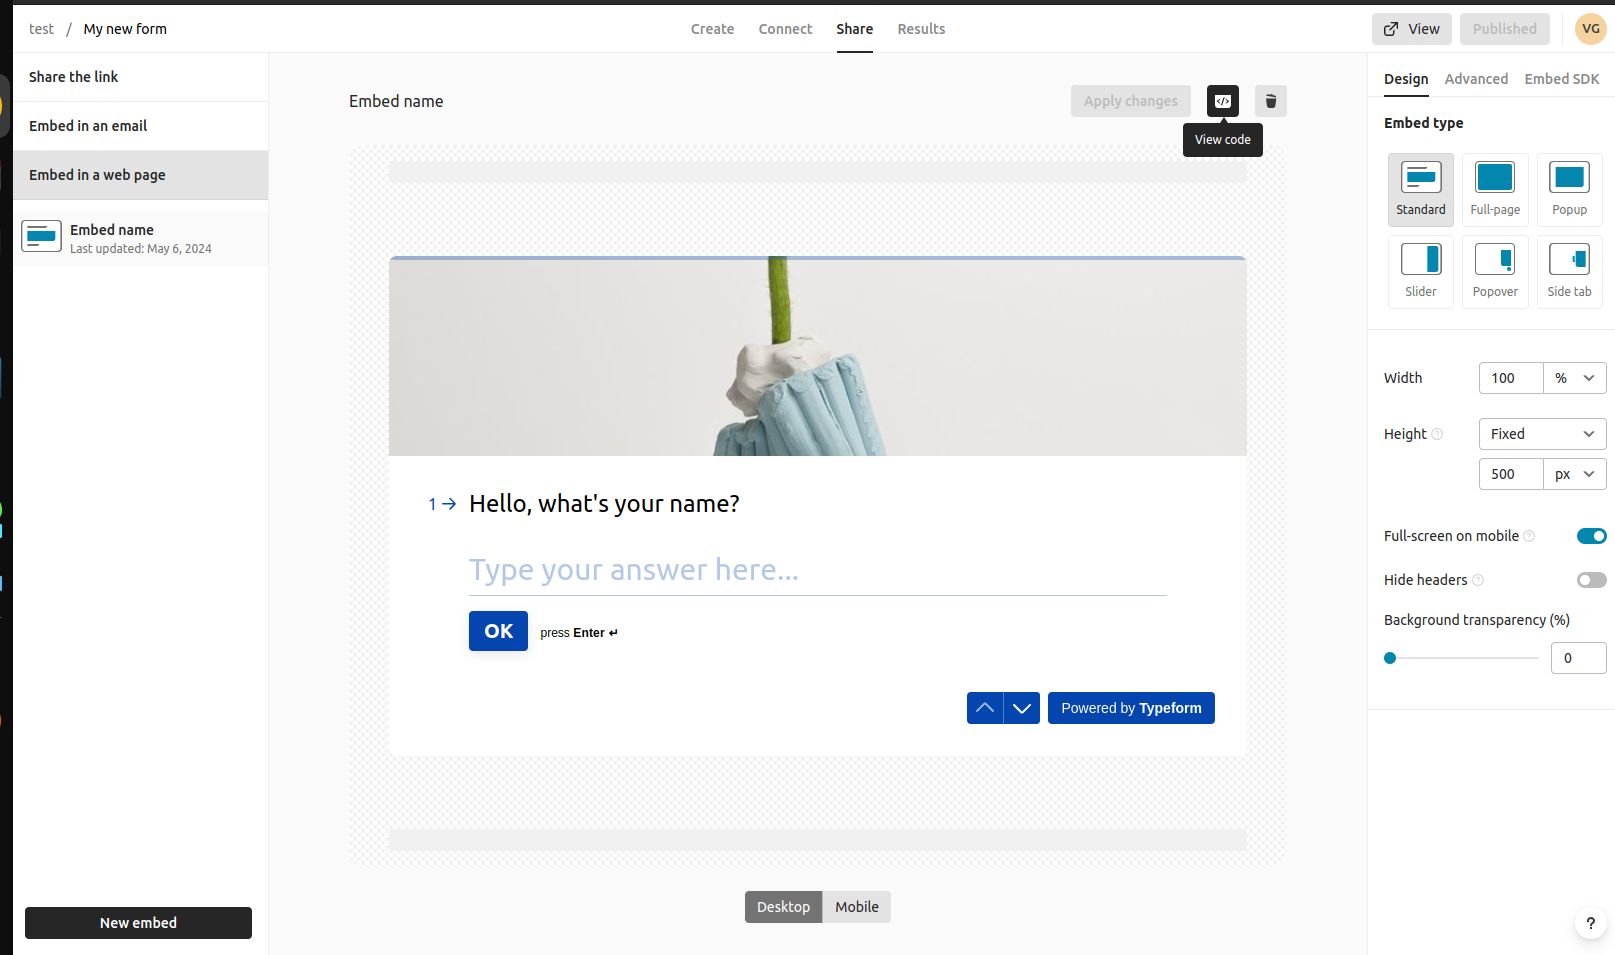
Generate Snippet on Typeform:
- Click on "Share" and then "View Code" to copy the snippet.
Embed in Webflow:
Use the snippet in Webflow to embed the Typeform landing.
Export this as a zip file.
Prepare Event Steps: Complete the event setup until this step.
Define the payment link to be , it can be any custom URL you want the payment landing to be (e.g., /payment-link/xr-test).
Obtain the productID from Stripe (ensure you're in Test Mode if needed).

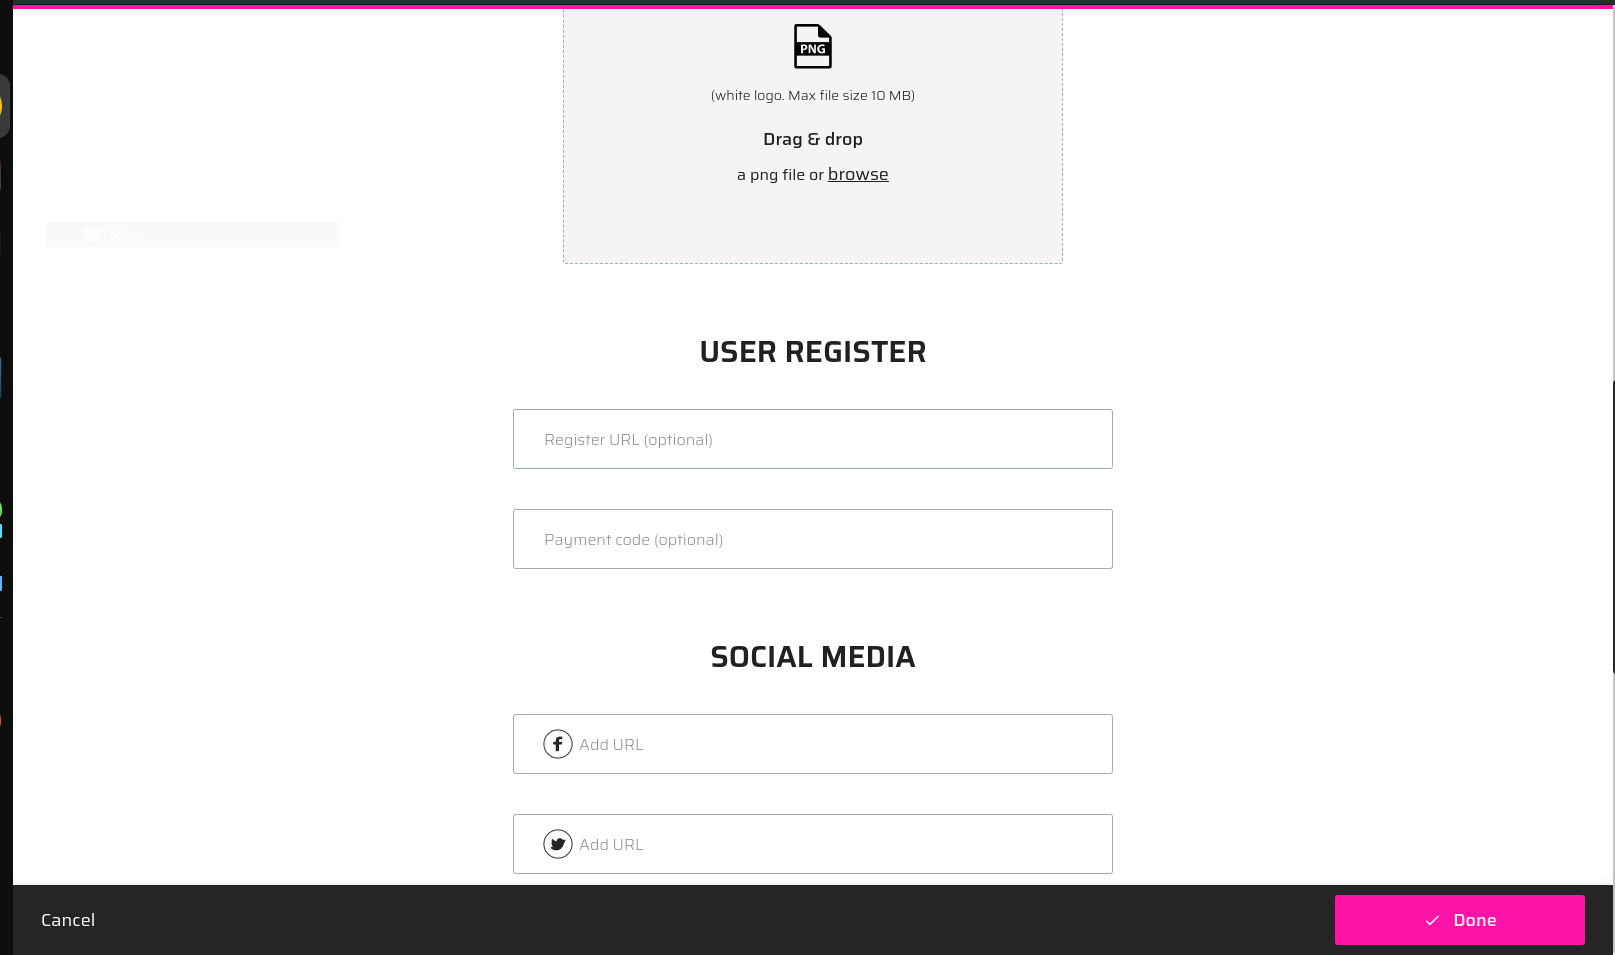
This would be the result in the User Register section:

- Create and Upload Event Custom Landings:
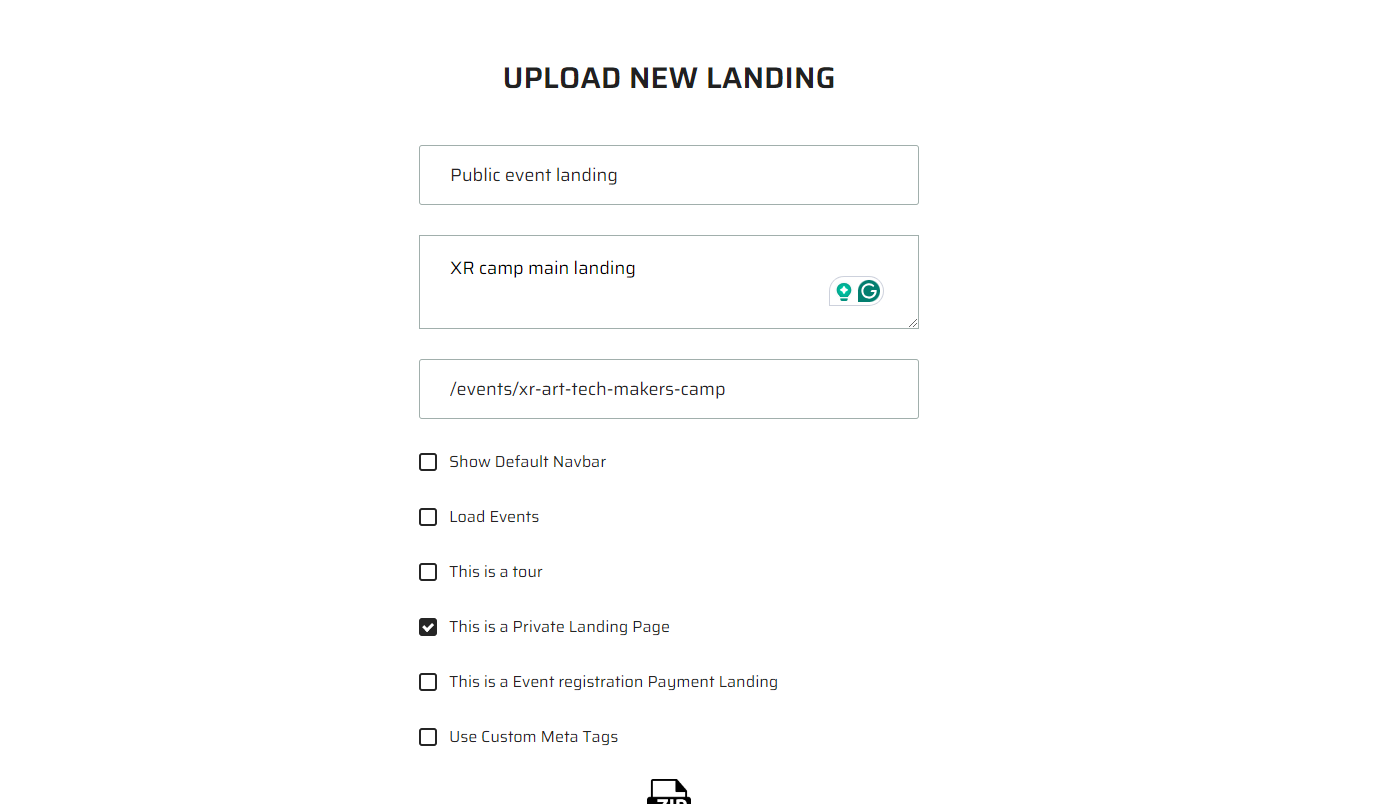
Event Information Landing: Create a landing page where users can see event details.
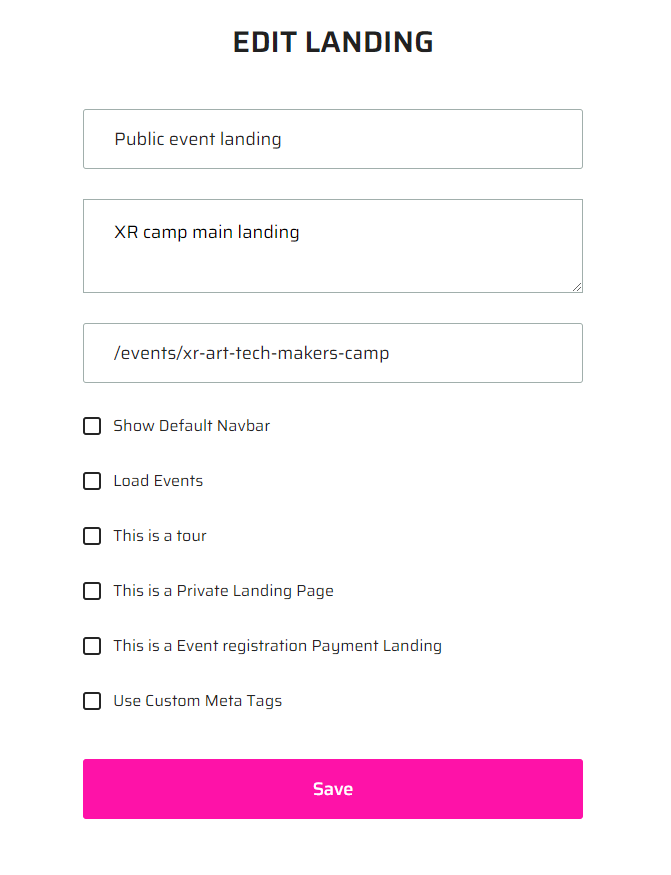
In this case there are no relevant changes, upload a custom landing for the event as described in the custom event landing section and just select the "This is Private Landing Page" option:
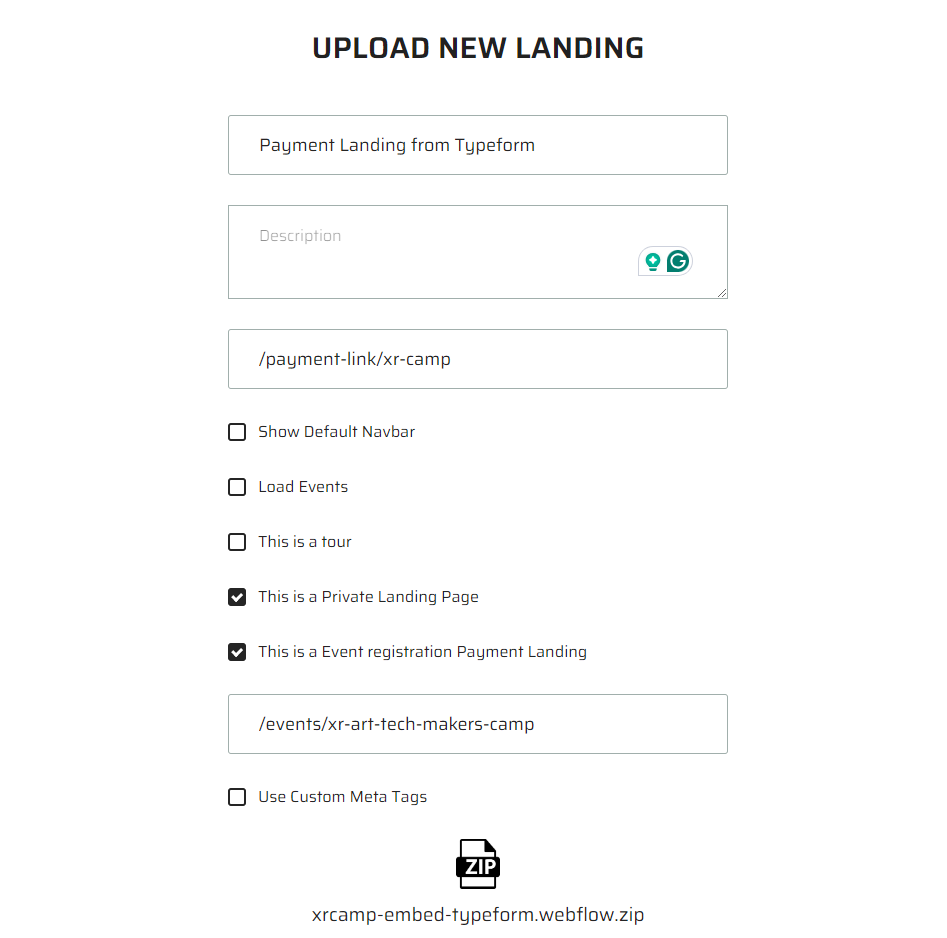
Upload Typeform for Payment Landing:
Use the Register URL from step 4 (e.g., /payment-link/xr-test) for the embed typeform zip.
Select the "This is a Private Landing Page" and "This is an Event Registration Payment Landing" options.
Embed Typeform Zip: Create a landing page with the embedded Typeform zip.
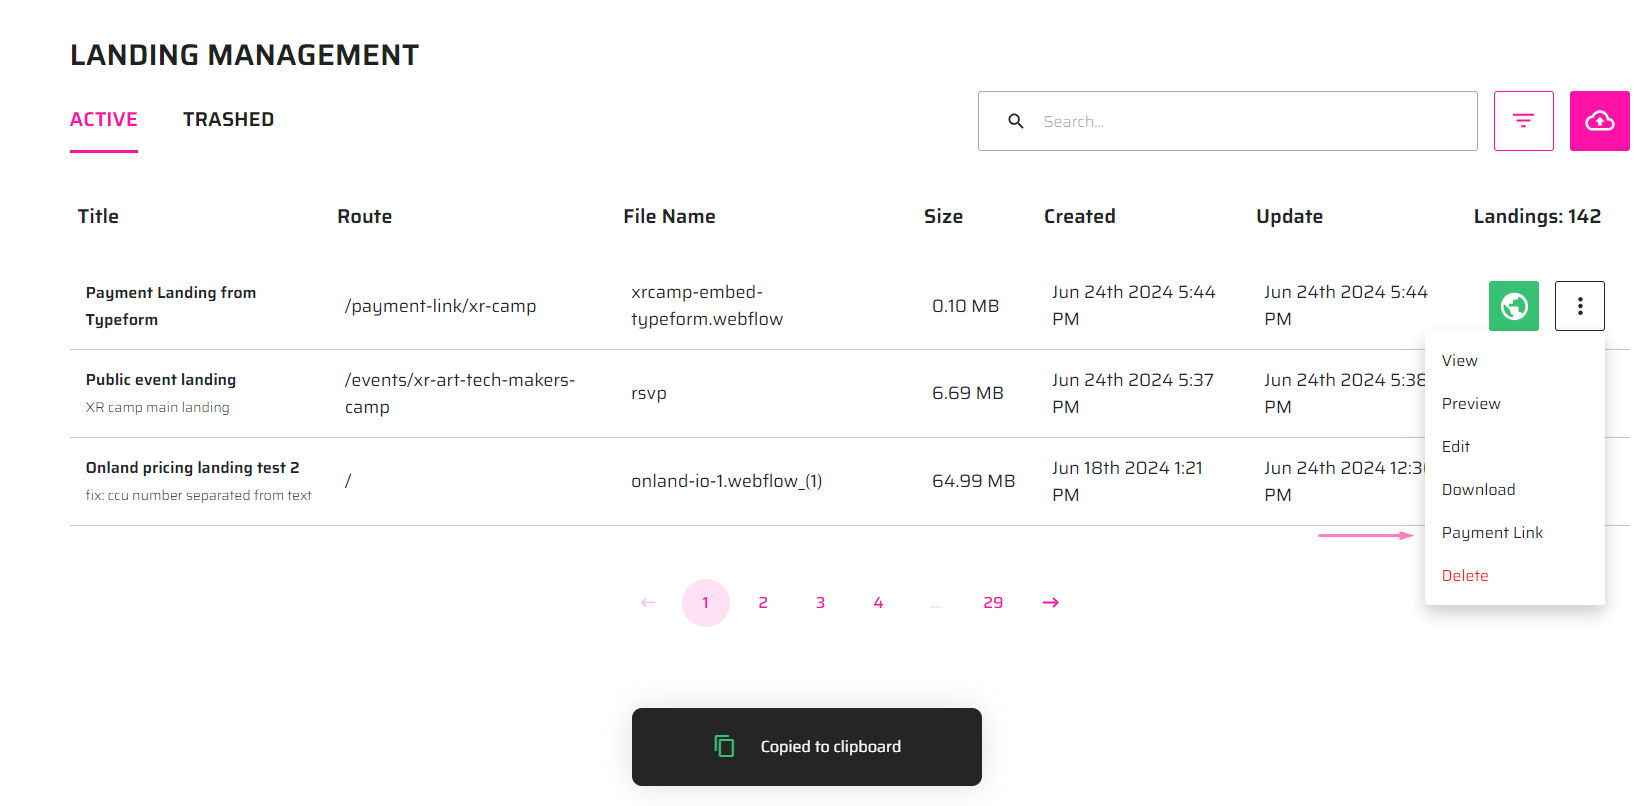
Retrieve Payment Link:
- Obtain the payment link from the Payment Landing (e.g., https://qa-dash.onland.io/payment/prod_Q1QOnUPi5OfT13?redirect=https://qa-dash.onland.io/events/event-name6).
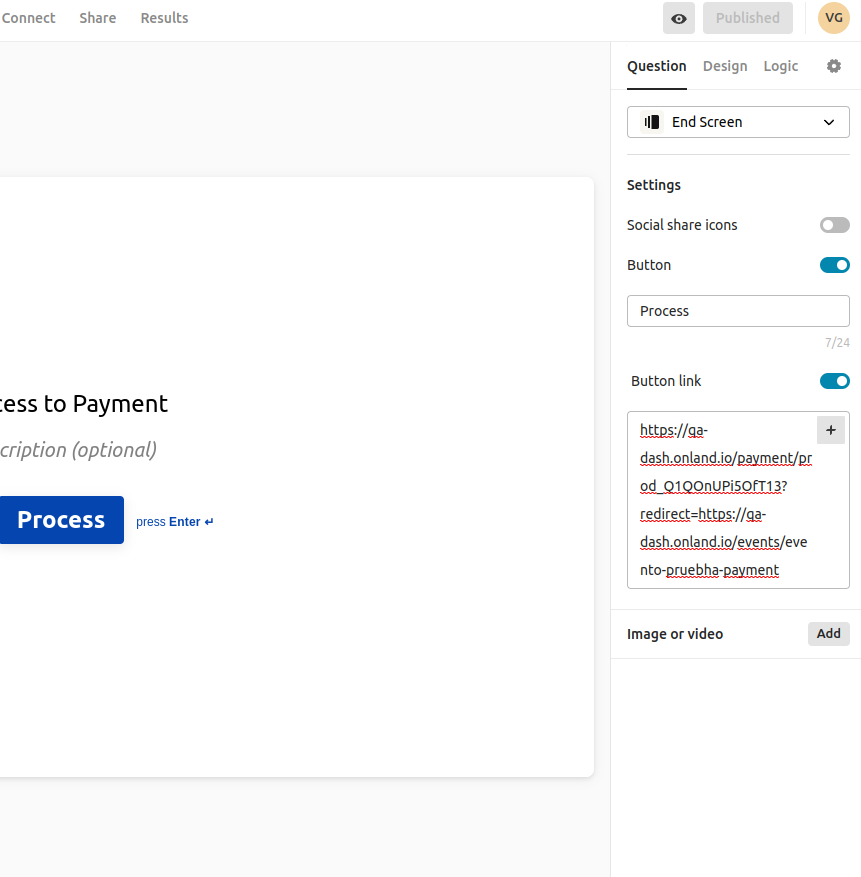
Insert Payment Link in Typeform:
- Paste this Payment Link in the Typeform button in the endings as “Button Link” to redirect users to the payment after completing the form.
- Paste this Payment Link in the Typeform button in the endings as “Button Link” to redirect users to the payment after completing the form.
Finalizing the Event
When accessing the event from a new account, the setup should be fully functional.
Note: If accessed by the organizer, they can already access the event, so the payment link will not be shown to them.