Publishing to the Metaverse
Publishing your project to the Metaverse allows users to explore, interact, and experience your world in real-time.
Whether you're creating a virtual environment, game, or interactive experience, deploying your project ensures your work is accessible to others.
Steps to Publish Your Project to the Metaverse
- Click the Launch button in the upper-right corner of XR Creator Studio.
- The Publish dialog opens, allowing you to choose how and where to deploy your scene:
- Production — Publish the experience to the live Metaverse, visible to all users. The Verses tab always reflects the currently deployed Production version.
- Development — Publish the experience to a test environment for previewing, validation, and iteration before going live. Development deployments are not saved or shown in the Verses tab.
🔹 Before exporting your project, make sure you have generated a NavMesh to optimize navigation and collisions.
➡️ For more information, see the Nav Mesh page.
Scene Health Check & Performance Report
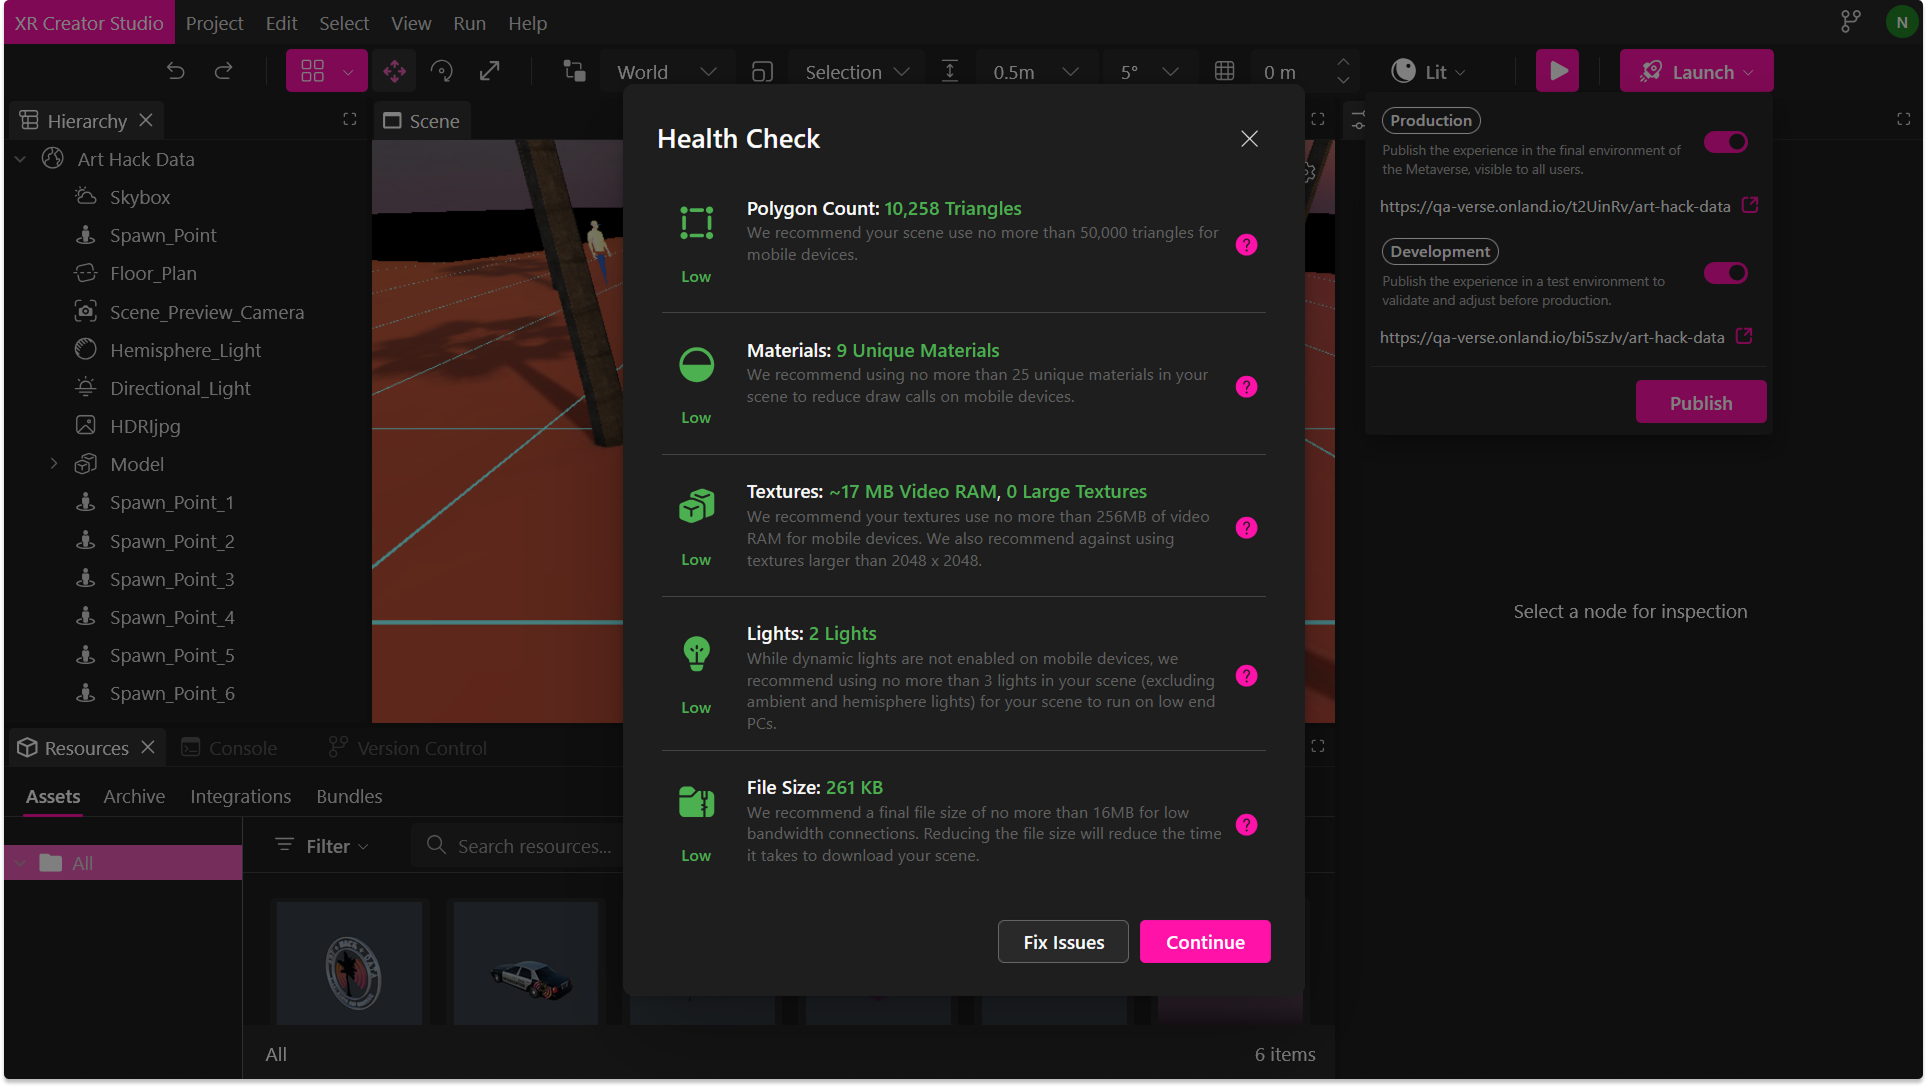
Once you initiate the publishing process, the XR Editor will:
- Perform a scene health check to analyze performance.
- Generate a performance report with optimization suggestions.
- Ensure that your scene meets deployment standards.
🔹 Pro Tip: Review the performance report and make necessary optimizations before publishing.
Publish Window
When publishing a project, complete the fields in the Publish window.
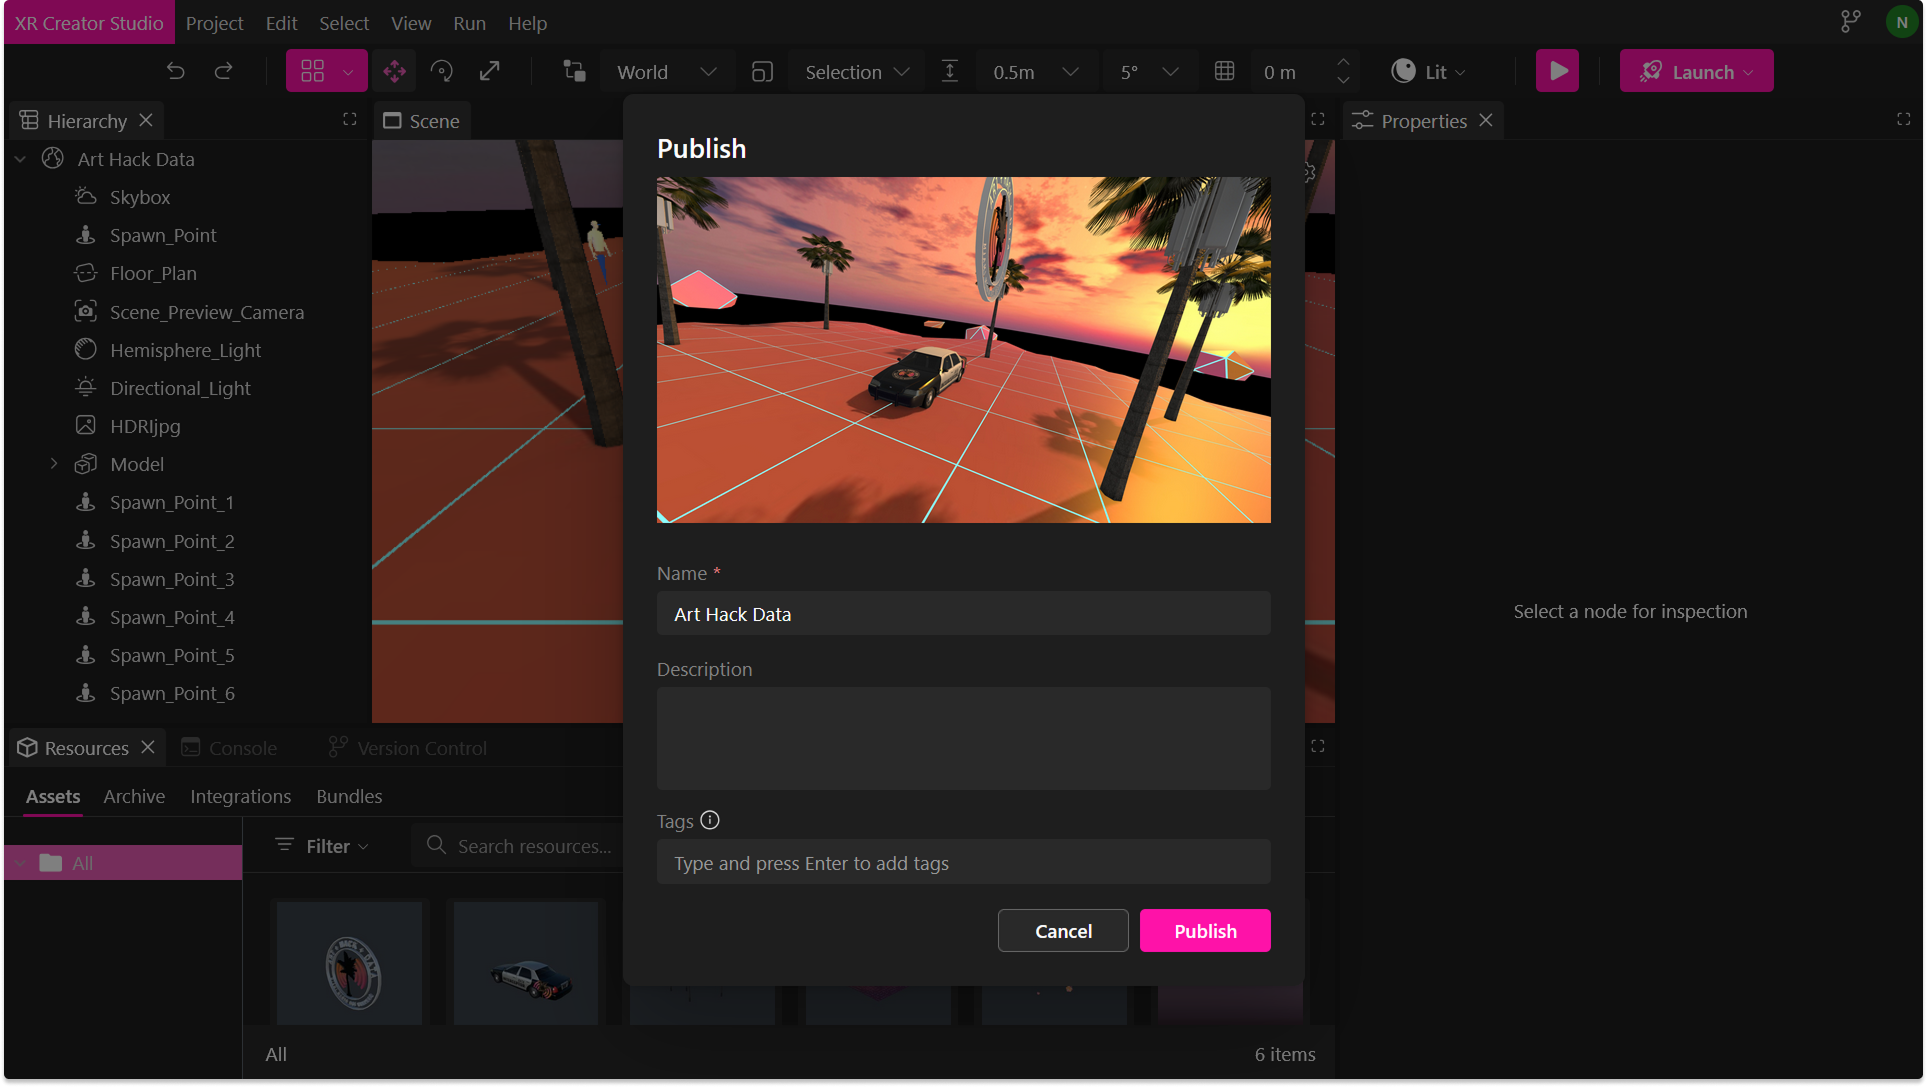
These values appear inside the deployed Verse and help users discover and understand your experience.
| Field | Required | Where it appears / What it does |
|---|---|---|
| Name | Yes | The public title of the Verse. Displayed in the dashboard and community listings. |
| Author | Yes | Shown inside the deployed Verse in the Info modal. Identifies who created or owns the experience. |
| Description | No | Also displayed inside the Info modal. Use it to describe the experience, provide instructions, or list credits. |
| Tags | No | Custom labels that improve search and filtering across the platform. Press Enter to add each tag. |
| Category | No | Used to categorize Verses in the Community tab, making it easier for users to browse by topic or collection. |
Click Publish to deploy your Verse with these details. You can update them later by republishing.
Finalizing & Viewing Your Scene in the Metaverse
- Click ‘Deploy to Metaverse’ to complete the publishing process.
- Your project will be exported and published to the Metaverse.
- A unique link will be generated for your Verse, where you can view your changes.
🔹 Pro Tip: Share your Verse link with others so they can explore and interact with your world.