Create Digital & AR Galleries with 3D Artworks
Uploading artwork in the Metaverse allows you to create virtual galleries, share your work with the community, and provide AR viewing options. Each artwork receives a digital information sidebar and a QR code, enabling users to view pieces in Augmented Reality (AR).
How to Upload and Create Artworks
- Navigate to the Resources section in the More menu.
- Click "Upload" to open the Upload Artwork form.
- Provide required details (Title, Date, Artist Name, and License).
- Optionally, add a description, medium, dimensions, and other metadata.
- Save the file—your artwork will now be displayed in the Verse.
Uploaded artworks can be placed in Media Frames or Snap Colliders for structured gallery displays.
🔹 Digital Twin Art
A Digital Twin is a virtual representation of a physical artwork.
Users must provide key details to generate a digital sidebar information and QR code, allowing others to view the artwork in AR.
Required Fields for Digital Twin Art:
- Title – Name of the artwork.
- Date – Date of creation.
- Artist Name – The creator of the artwork.
- Use License – Select the appropriate license for the artwork.
Optional Fields for Digital Twin Art:
- Description – Additional details about the piece.
- Medium – Materials used in the artwork.
- Frame – Select a frame for images.
- Dimensions – Physical size of the artwork, this will mimic the size in the virtual work.
- Digitization Technique – How the artwork was digitized.
- Current State – Condition of the physical artwork.
- Labels – Tags or categories for classification.
- Bio – Artist’s biography.
- Artist Statement – A personal statement about the artwork.
- AI Creation Indication – Specify if AI was used in the creation.
🔹 Digital Art
Users can upload purely digital artwork for display in a Verse gallery.
Required Fields for Digital Art:
- Title
- Date
- Artist Name
- Use License
Optional Fields for Digital Art:
- Description
- Medium
- Labels
- Bio
- Artist Statement
- AI Creation Indication
🔹 Pro Tip: Digital Art and Digital Twin Art can be modified anytime by right-clicking on the artwork and selecting Properties. Changes will reflect in the Info Panel.
Displaying Artwork Information
The artwork information is organized into two sections: the 3D world display (the art labe), and the 2D sidebar. The 3D world display presents the artwork with and info button visually within the environment to provide essential details at a glance. The 2D sidebar offers in-depth information, including a QR code for AR viewing. Understanding how information is distributed across these sections will help you create and present artworks more effectively in the Metaverse.

Info Panel (Detailed Information)
The Info Panel includes metadata such as:
- Title
- Date
- Artist Name
- Description
- Medium
- Dimensions (Digital Twin Art)
- Artist Bio
- Artist Statement
- Labels
- Current State
- Digitization Technique
- AI Creation Indication
- Date of Birth
- Dimensions (Digital Twin Art) How to View the Info Panel:
➡ Hover over the artwork and left-click on the info button to open the full details.
Adding Frames & Mediums
Frames and mediums personalize the artwork and can be viewed in AR when scanning the QR code.
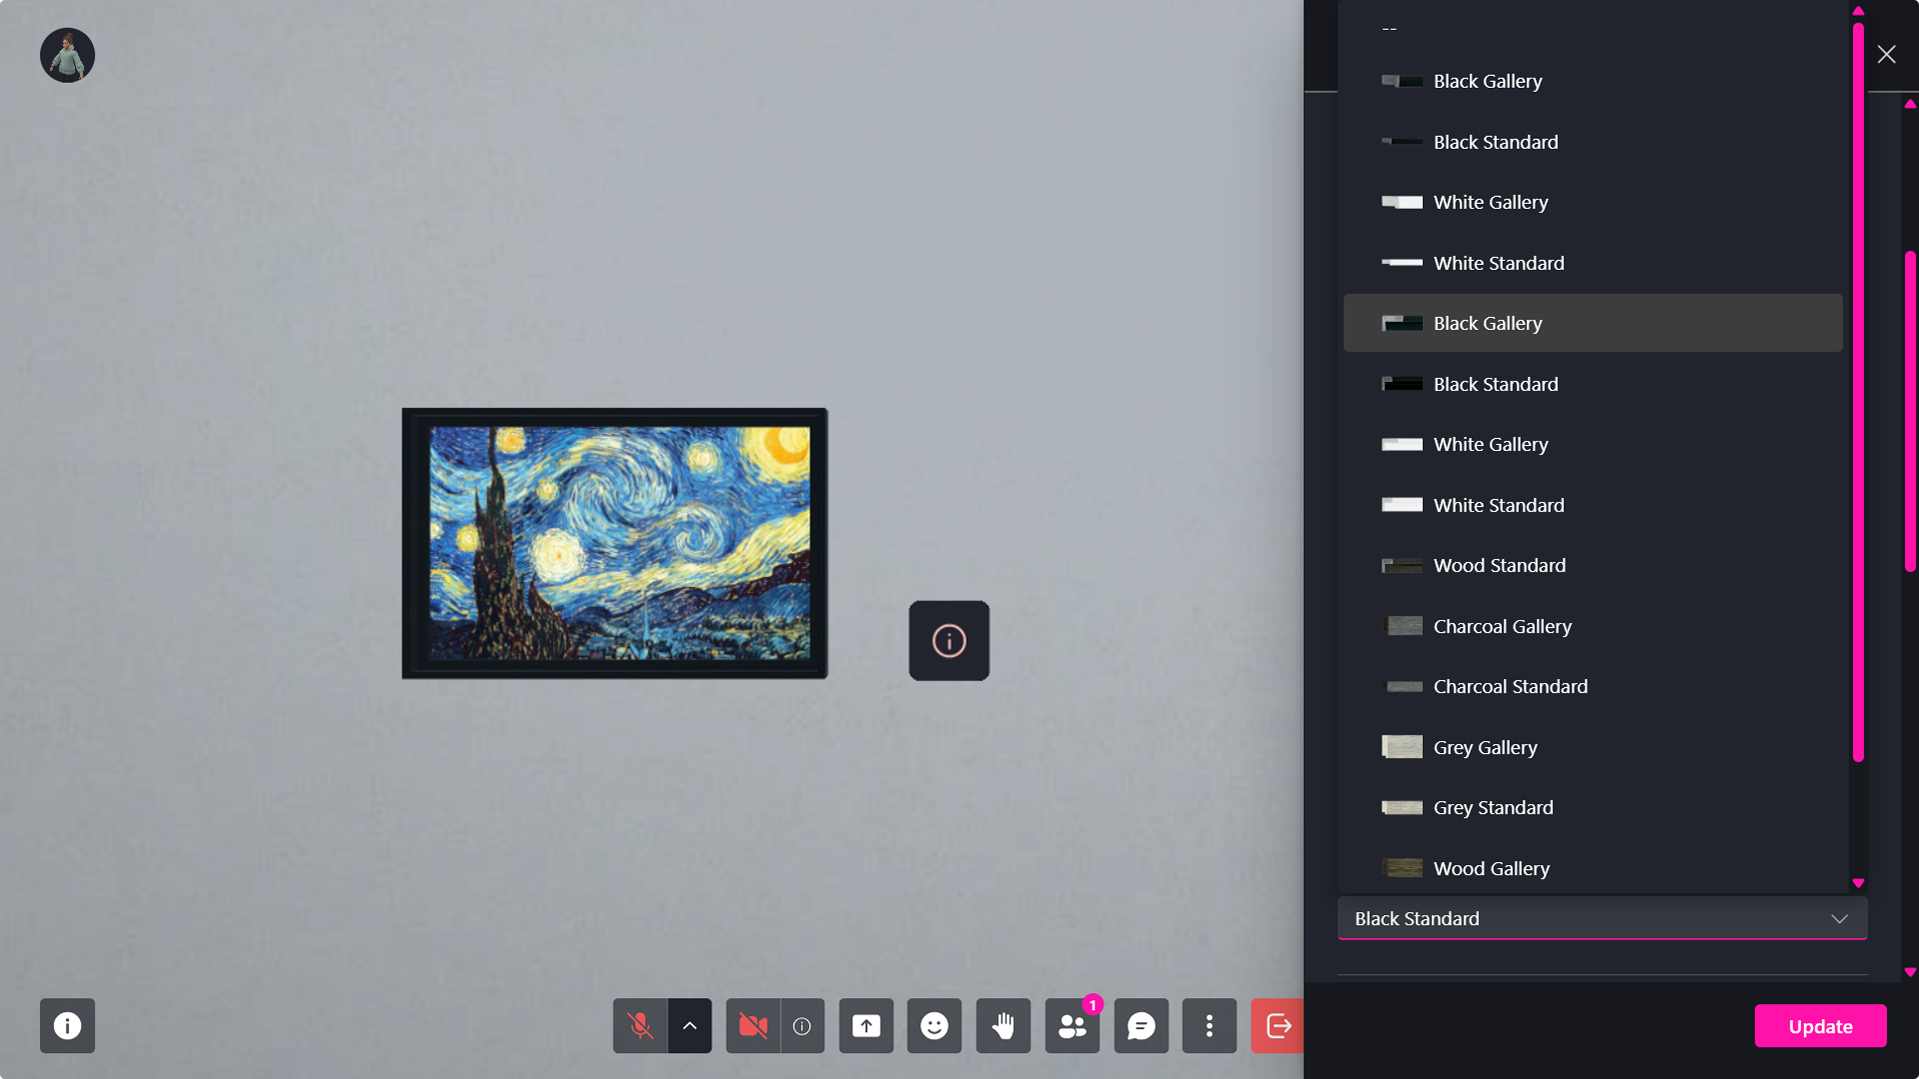
How to Add Frames & Mediums:
- Right-click on the artwork.
- The Properties panel will open, scroll to the Media section.
- Select the desired frame and medium.
- Changes will automatically reflect in the 3D world.
- The change wil also automatically reflect in AR when the QR code is scanned.
🔹 Pro Tip: Frames and mediums allow digital galleries to feel more immersive and true-to-life.
Optimizing GLB Artworks
If you choose to use a GLB file as an artwork, you can analyze the model’s file size and complexity after uploading it.
If the model exceeds recommended performance limits, the system will prompt you to run optimization.
How Optimization Works
The optimization tool reduces:
- Polygon density
- Texture resolution
This improves load times and performance while preserving visual quality.
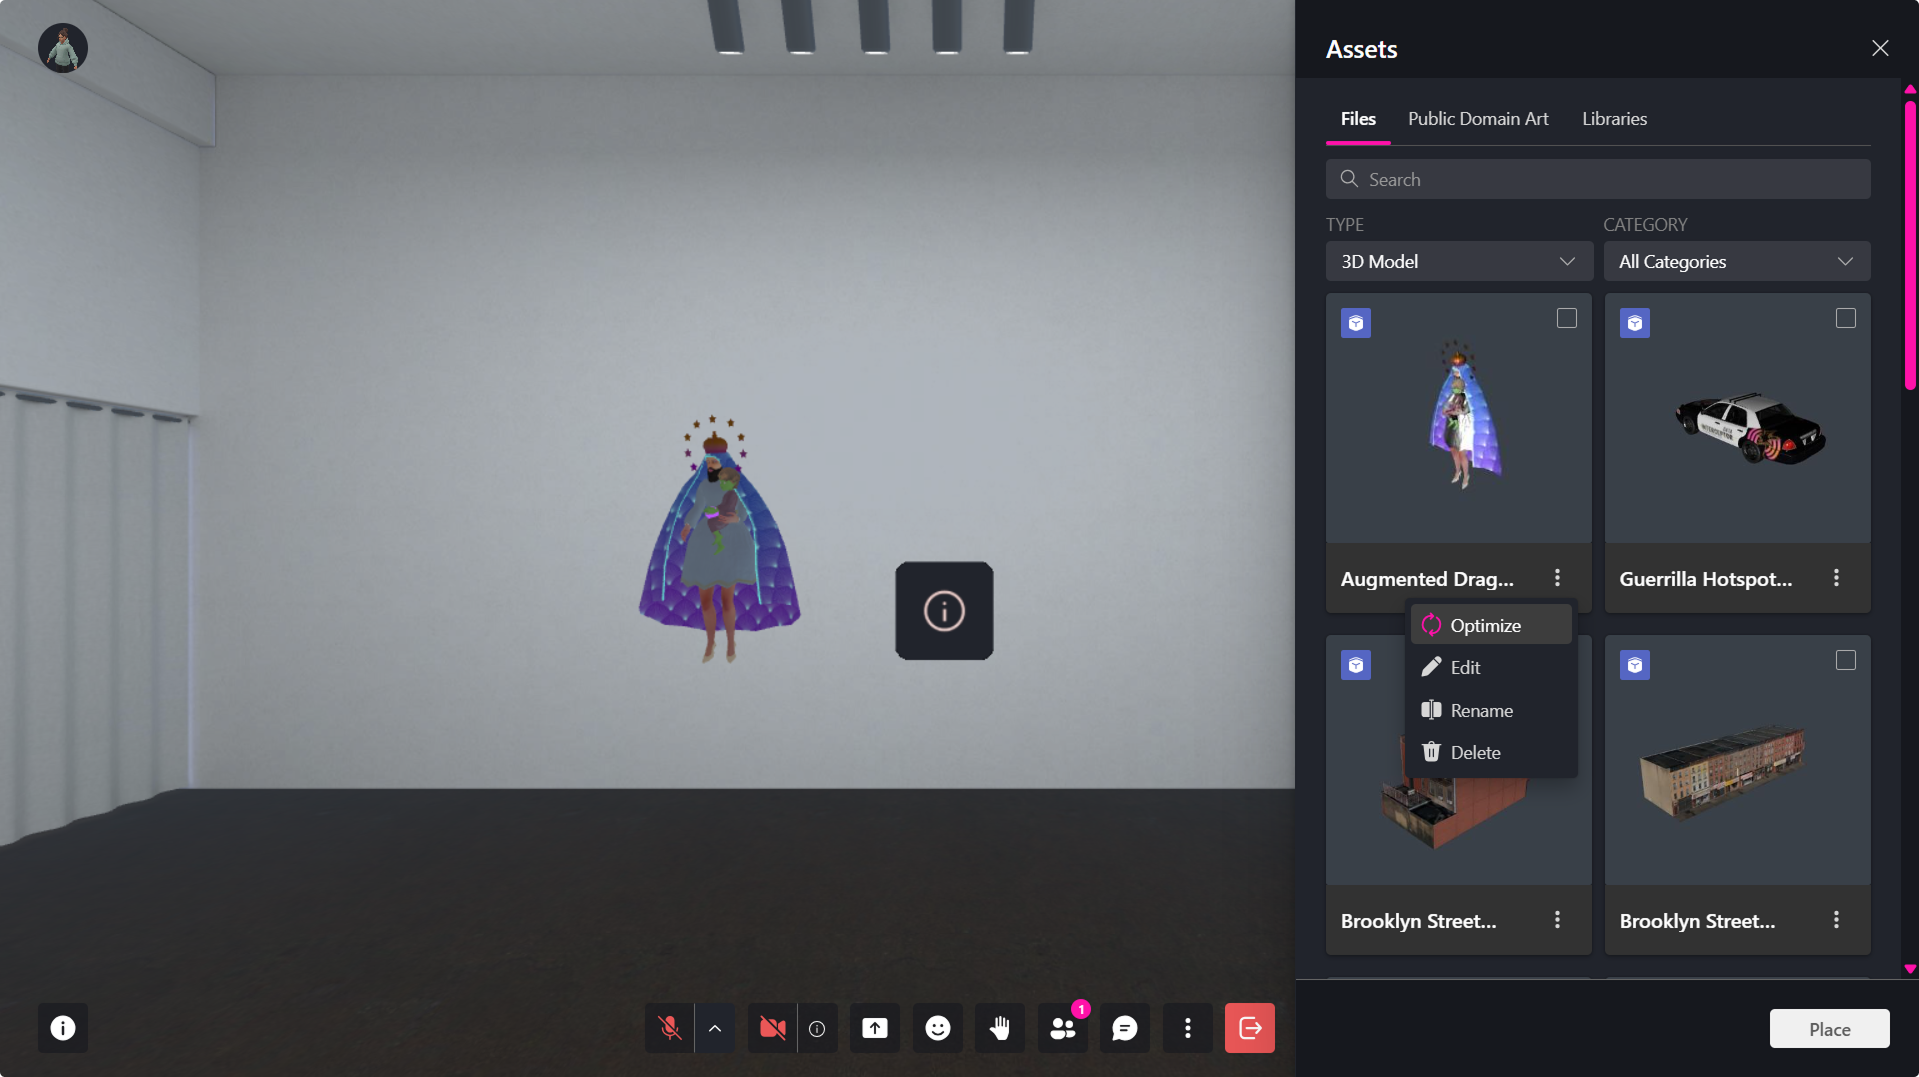
When optimization is available, open the model’s options and select "Optimize."
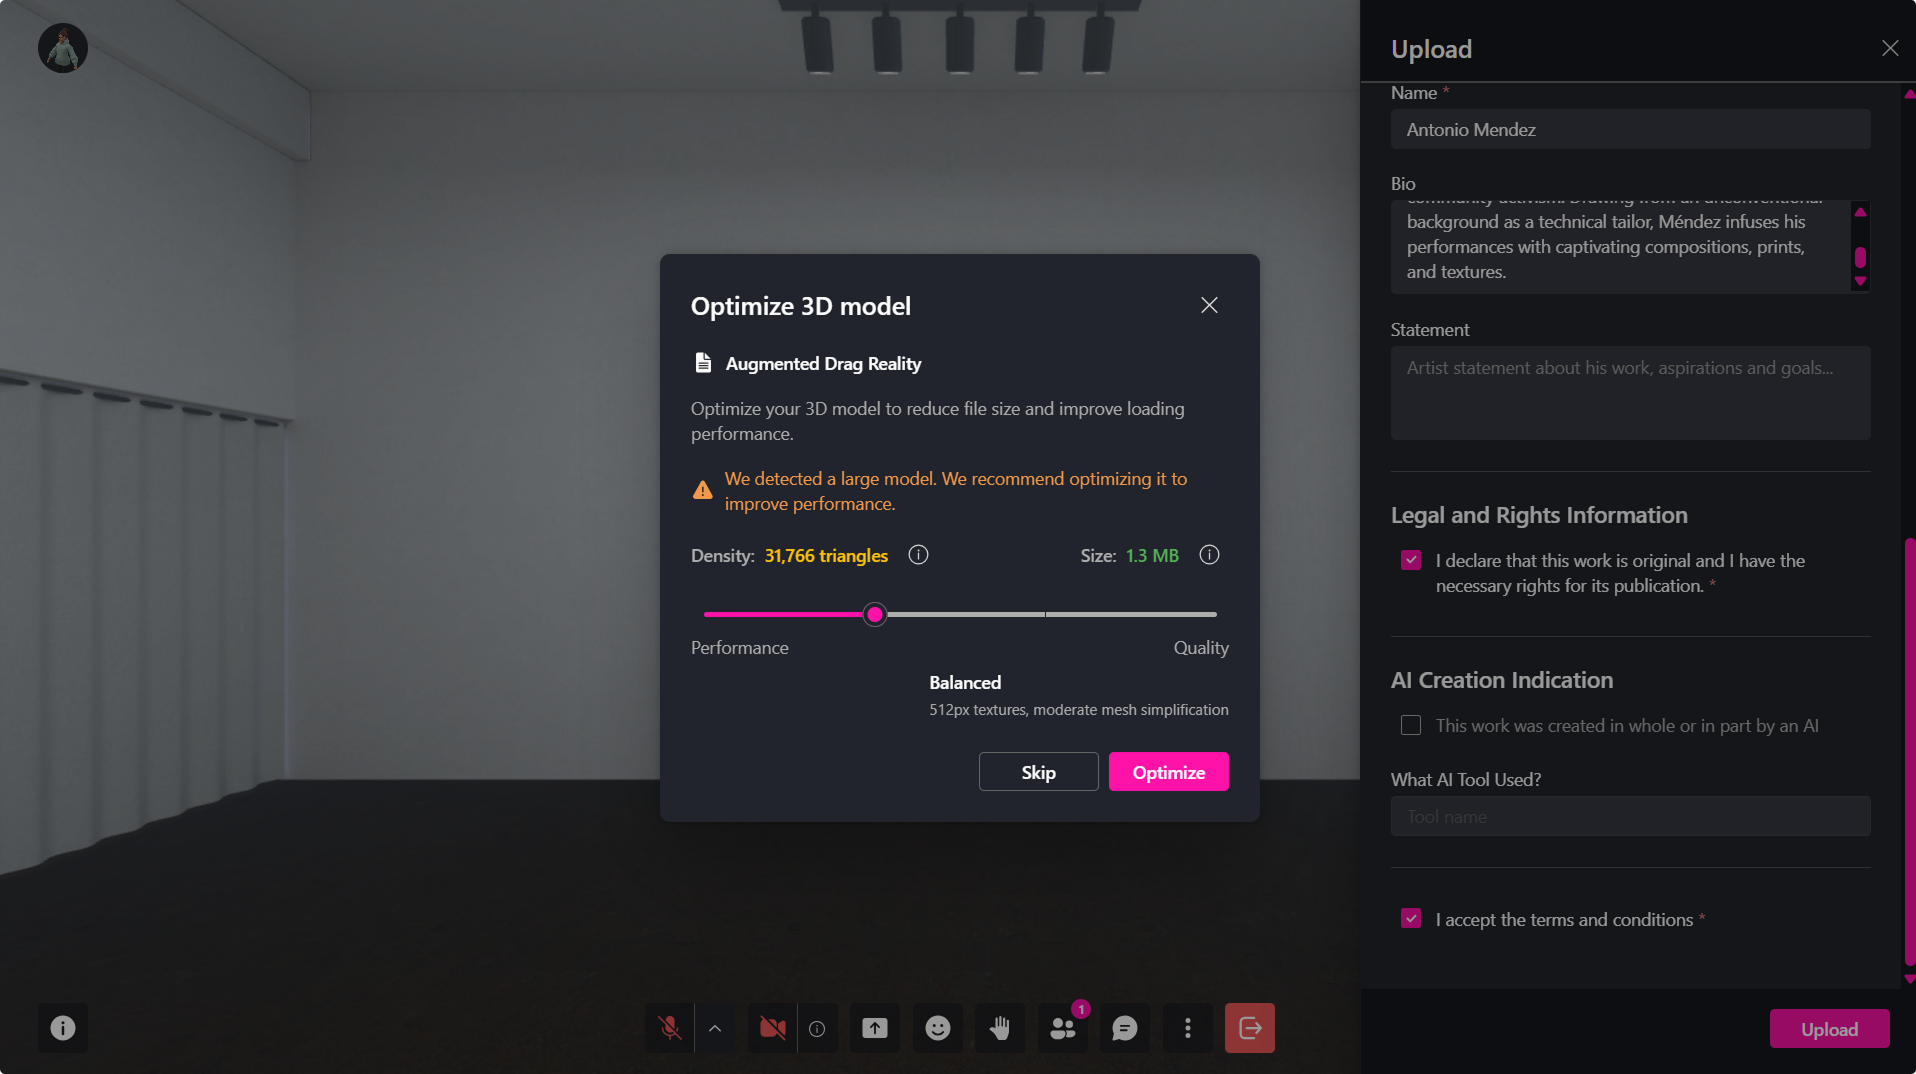
Optimization Workflow
Step 1: Open the Optimization Tool
- During upload: prompted automatically after uploading a glb.
- After upload: open the object’s dropdown menu in the Assets Panel and select Optimize.
Step 2: Adjust Optimization Level
A performance–quality slider appears:
- Move left for higher performance (smaller file size, fewer polygons).
- Move right for higher quality (more detail, larger file size).
The dialog displays live previews of:
- Current polygon density
- Current file size
Step 3: Preview the Result
A preview window displays how the optimized model will look, allowing you to compare the updated version before applying any changes.
Step 4: Confirm Optimization
Choose one:
- Create a Copy – saves the optimized version as a new file.
- Optimize Original – replaces the existing version.
🔹 Pro Tip: Regularly optimize imported assets from external sources like Sketchfab to maintain high performance across devices.