Building Your First Verse
To create and save projects, deploy Verses, and customize your user settings, you need to create an account.
Signing up is quick and easy, we offer two options: sign up with email and password, or sign in with your Google account.
- Navigate to our login page and click on the sign-up button.
- Provide an email address and enter a password to create an account. Alternatively, you can sign up directly with your Google account.
- If you entered a password, verify your account by entering the confirmation link sent to your provided email address.
🔹Now, let’s dive into the process of creating your first Verse! 🚀
1. Create Your First Project
When starting a new project in XR Creator Studio, you can either:
Use a pre-made template for a faster start.
Create a scene from scratch for full customization.
How to Start a New Project
Open XR Creator Studio.
Click the “Add” button.
Choose between:
Template – A ready-made scene with objects and settings
Create Empty Project – A completely empty world for custom design
Enter a name for your project.
Click “Create” to enter the editor.
2. Upload 2D Elements and 3D Models
You can add 3D objects and other elements to your project using:
Your Own 3D Models (.GLB, .GLTF, .OBJ files), videos, images, and .mp3 files.
Use external assets from our resources panel like 3D Models from Sketchfab or sounds from our Sound Pack
How to Upload an Asset
Click the “Add” button in the Assets Tab.
Select a file from your computer.
Once uploaded, drag & drop it into the project viewport.
Use move, scale, and rotate tools to alter the asset.
🔹 Pro Tip: Optimize the size of your 3D models to enhance performance, or opt for low poly 3D models from Sketchfab. Apply the same strategy to your 2D elements.
3. Add Ground Plane & Environment Elements
To create a realistic environment, you can add:
A Ground Plane element.
Water, Mirrors, Primitive Mesh, Skybox & Lighting elements.
How to Add Environment Elements
- Open the “Elements” panel located in the XR Creator toolbar.
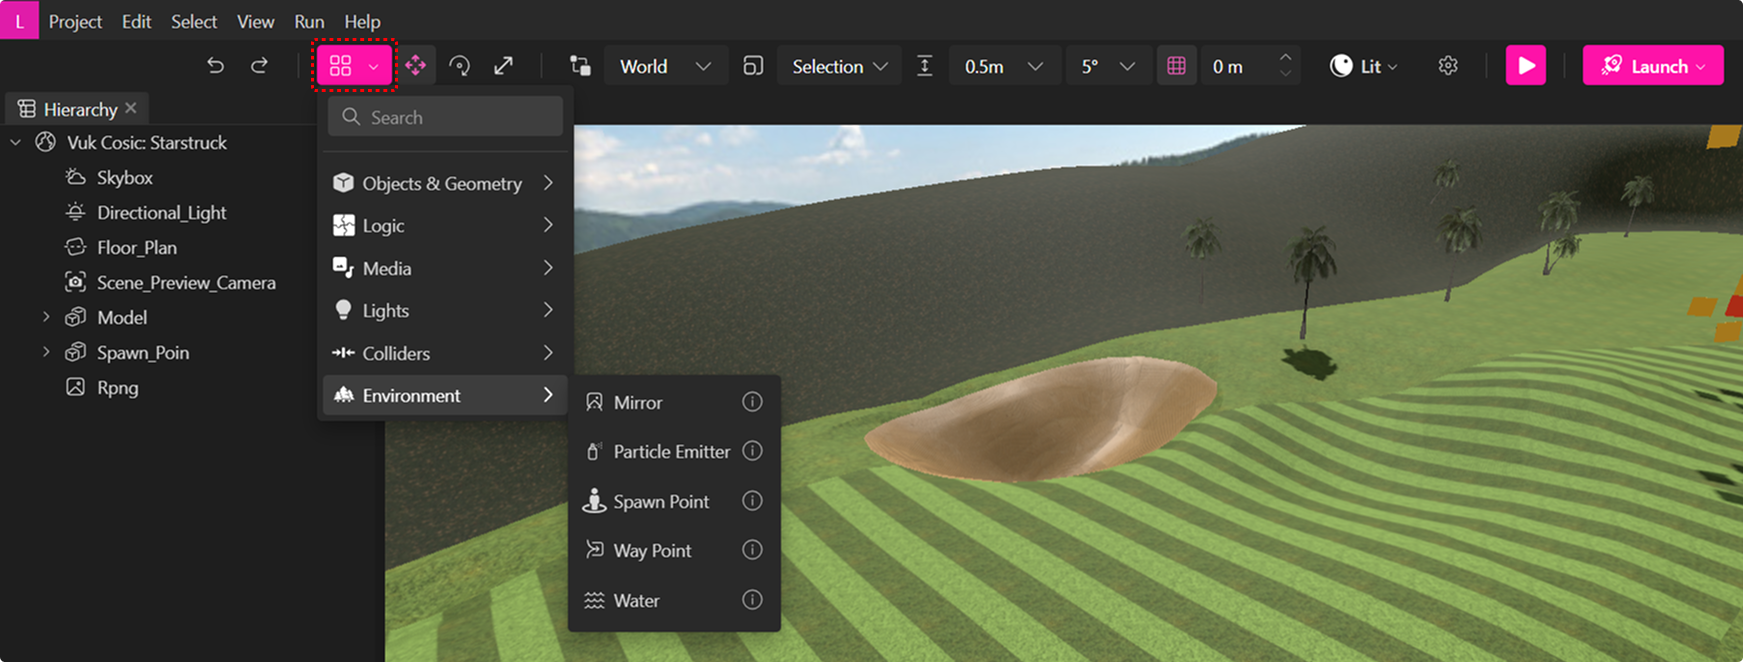
- You can choose:
Ground Plane – A simple floor for your scene, this element generates a flat ground plane that extends into the distance.
Skybox – Customizable background/sky. You can change the settings to reflect the time of day.
Water – Realistic animated water plane.
Mirror – A reflective mirror surface.
Primitive Mesh - Adds a basic building block, with this element you can construct more complex 3D objects.
- Position the element in the viewport by clicking on it and then clicking the place you want the object to be positioned.
- Adjust scale, color, and position in the Properties Panel.
🔹 Pro-Tip: Use fog effects & lighting to add depth.
To see all the Elements we offer in more depth, see our dedicated section
Publish & Share Your World
Once your scene is ready, publish it as a Verse so others can explore it.
How to Publish a Project
Click "Launch" in the Toolbar Menu.
Select "Deploy to Metaverse".
Set a new name for your project or keep the previous one.
Click "Publish".
A unique URL will be generated for your Verse when you click the "Try It Now" button.
🔹 Note: You can also access your Verse anytime in the Verses tab.
Entering a Verse for the First Time
Once your project is published as a Verse, you can join, explore and share it with other users.
When you first enter, you’ll arrive in the Verse Lobby, where you can:
👀 Observe ongoing activities in the Verse.
💬 Chat with other users via text chat.
How to Enter the Main Verse
- Desktop and Mobile Users:
- Click "Join Verse".
- Choose an avatar and a username.
- Make sure to enable your microphone for voice chat.
- Explore and interact!
- VR Headset Device Users:
🔹 Follow the Metaverse documentation instructions for your device.
Moving & Navigating the Verse
Desktop Controls:
Move using WASD or arrow keys.
Teleport by right-clicking.
Click & drag left mouse button to rotate view or use the Q & E keys.
Mobile Controls:
Move using the left on-screen joysticks. Alternatively, use pinch gestures on the screen to adjust movement.
Rotate by using the right on-screen joysticks, or simply drag with one finger to adjust your perspective.
VR Controls
Move using the Left Thumbstick to walk forward and backward.
Rotate by using the Right Thumbstick to rotate your view and adjust your direction.
🔹 Refer to our controls guide for VR-specific navigation.
Sharing via Link or QR Code

After publishing, you can invite users in two ways:
- Share a Direct Link
Copy & send the URL to others.
Users can join via desktop, mobile, or VR.
- Use the Generate a QR Code
Users can scan the QR code to enter the Verse.
Ideal for events, posters, and quick sharing.
🔹 Ready to start? 👉 Open XR Creator Studio
🔹 Need help? 👉 Visit Support & Troublesooting